As many of you know by now, the power that Apps bring to us who are always looking to automate and make better use of Jira is, well, powerful! In this blog I'd like to show you some really cool ways you can do auto-assigning of Jira issues using the Automation for Jira App. I have seen various use cases across different organizations for ways they would like to see issues assigned automatically.
Thankfully, a lot of these use cases are easily handled with Automation for Jira and you don't have to script anything yourself! This is a great selling point for Automation for Jira: it saves companies time and money by providing built-in automation so that they do not need to reinvent the wheel, PLUS the automation rules take just minutes to set up and are very intuitive! Automation for Jira takes implementing and managing your own scripts off the table, replacing that large workload you would have had to undertake with an easy-to-use visual automation rule builder.

And before I dive into some use cases for auto-assigning, I will mention that Automation for Jira has hundreds of other capabilities outside of auto-assigning, such as automatic monthly recurring tasks, automatic responses to known errors, automatic reactions for SLA breaches, and more. If you want to learn more about Automation for Jira, please visit their marketplace listing here. I will note that this is not a free Appn, but you can try it out for free, and the pricing is very fair.
Okay, let's jump into some Auto-Assigning magic!
Setting up your Automation Rule
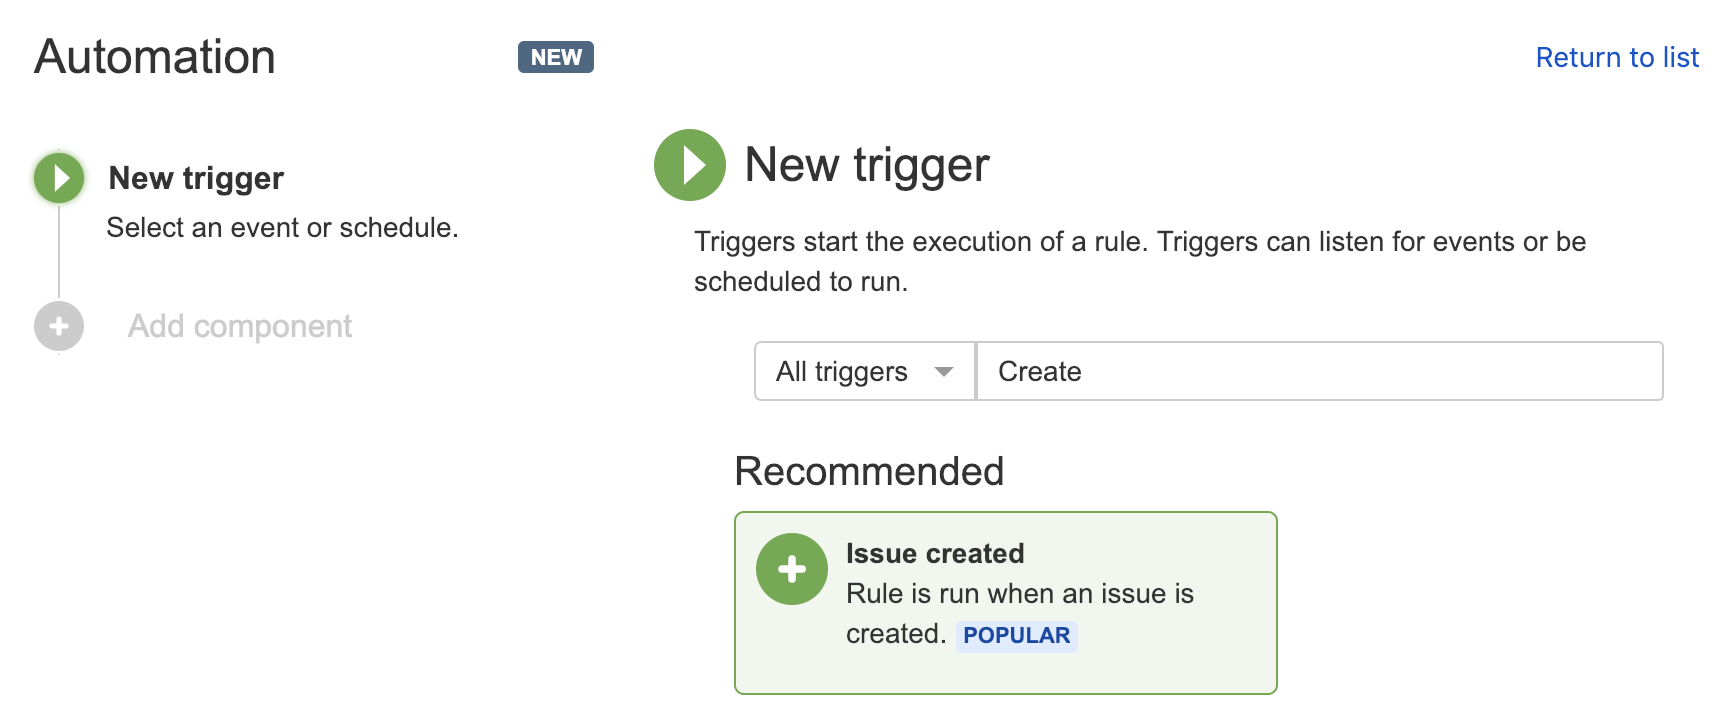
- Choose the Trigger - The first step in setting up an automation rule in Automation for Jira is to choose a trigger, which will trigger the automation rule to run. You can select things like when an issue transitions, is commented on, or is closed.
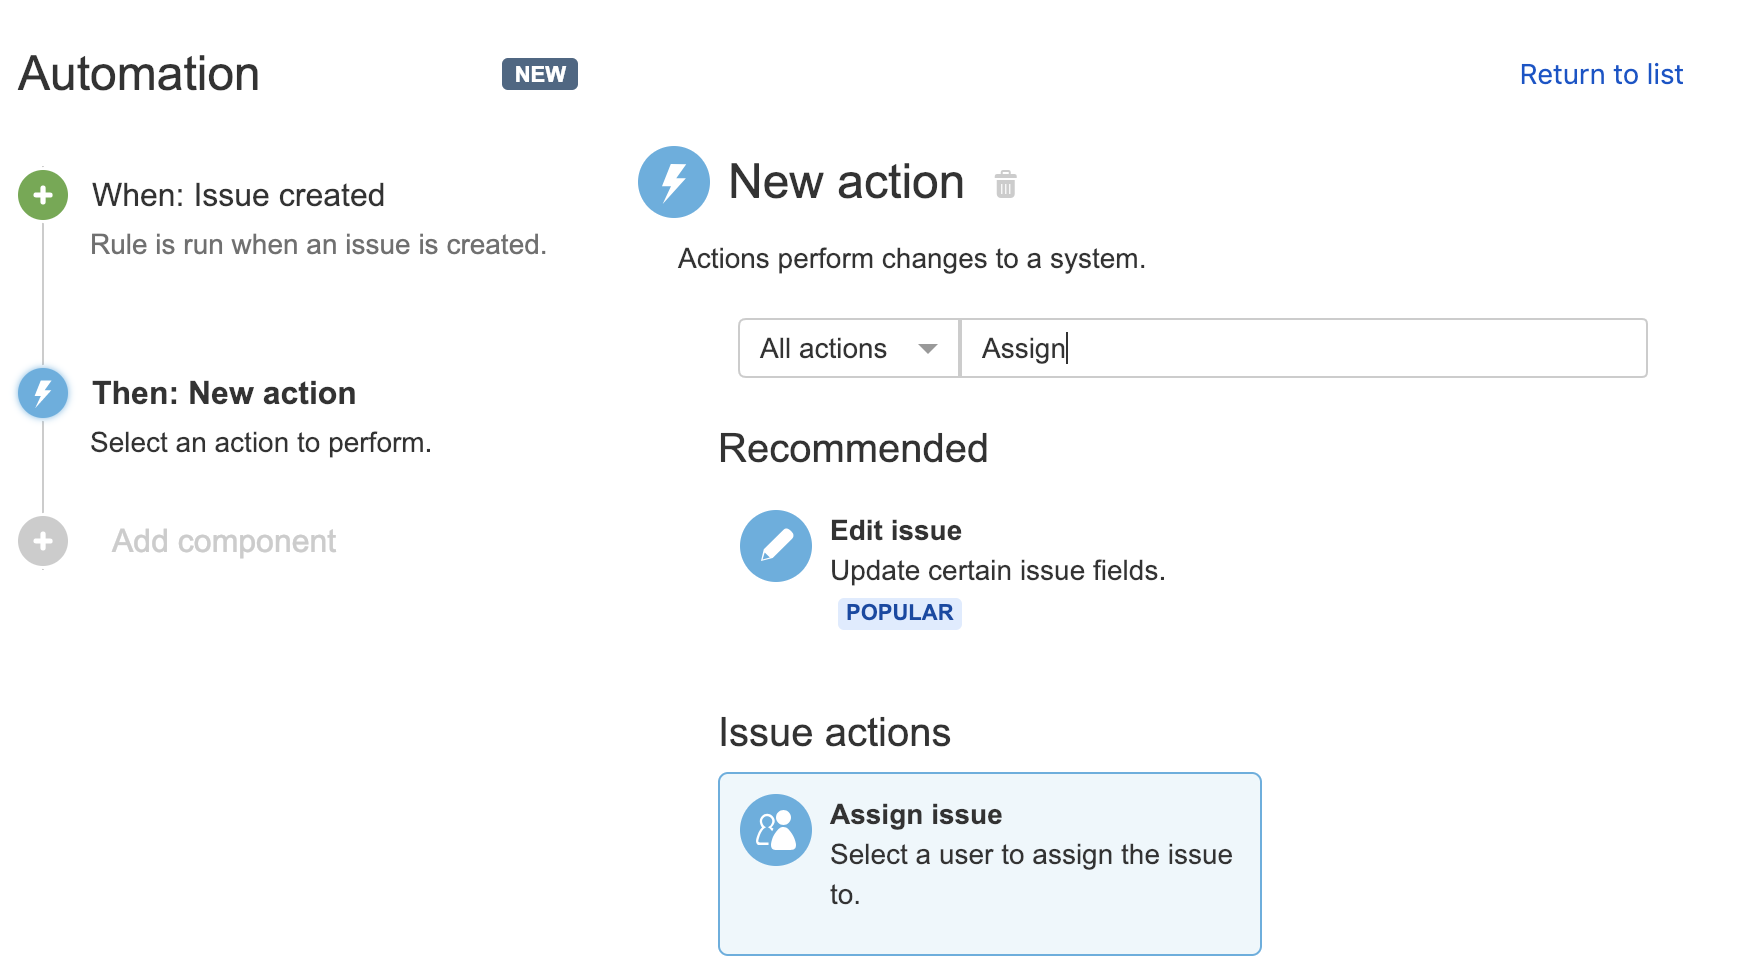
- Add Component - Next, you can choose a condition, action, or branch rule to add to your automation. If you only wanted this to run on the results of a particular JQL query, for example, you could do so. The Actions component is where the fun stuff lives--this section houses the automation actions that will occur given your trigger has happened and your conditions are met.
Now let's see what sorts of things we can do with auto-assigning!
Balanced Workload Assigning
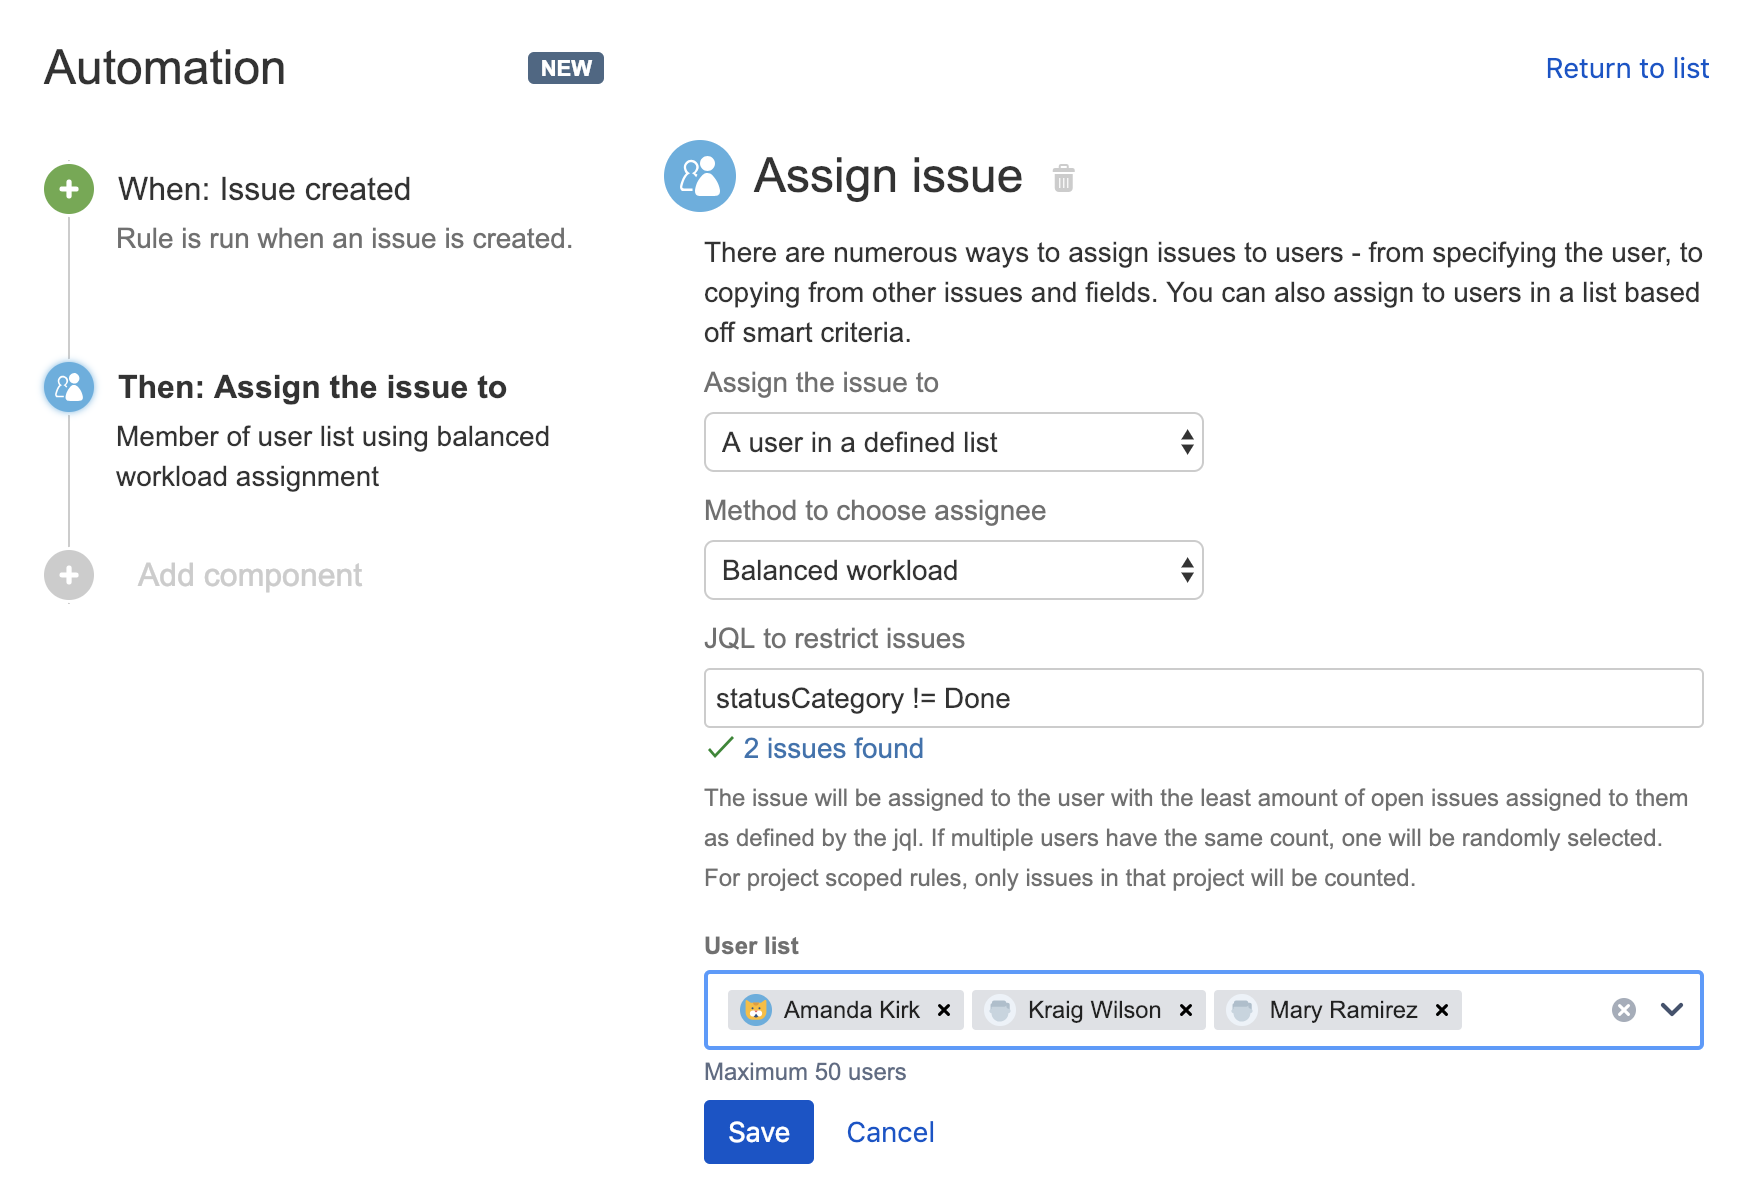
Boy, do I wish I knew about this when I first started using Jira! The use case goes like this: If we want to keep the workload balanced across our team, we would want to evaluate who should be taking on each newly created issue based on how much work everyone currently has. The person with the smallest amount of workload would take the new issue, and so forth. This automation rule will look at your list of users and calculate how many open issues each of those users are assigned to currently and assign this newly created issue to the person with the smallest current workload! This keeps things fair AND keeps management/SM/PM's hands clean of micromanaging.
Synchronized Assigning
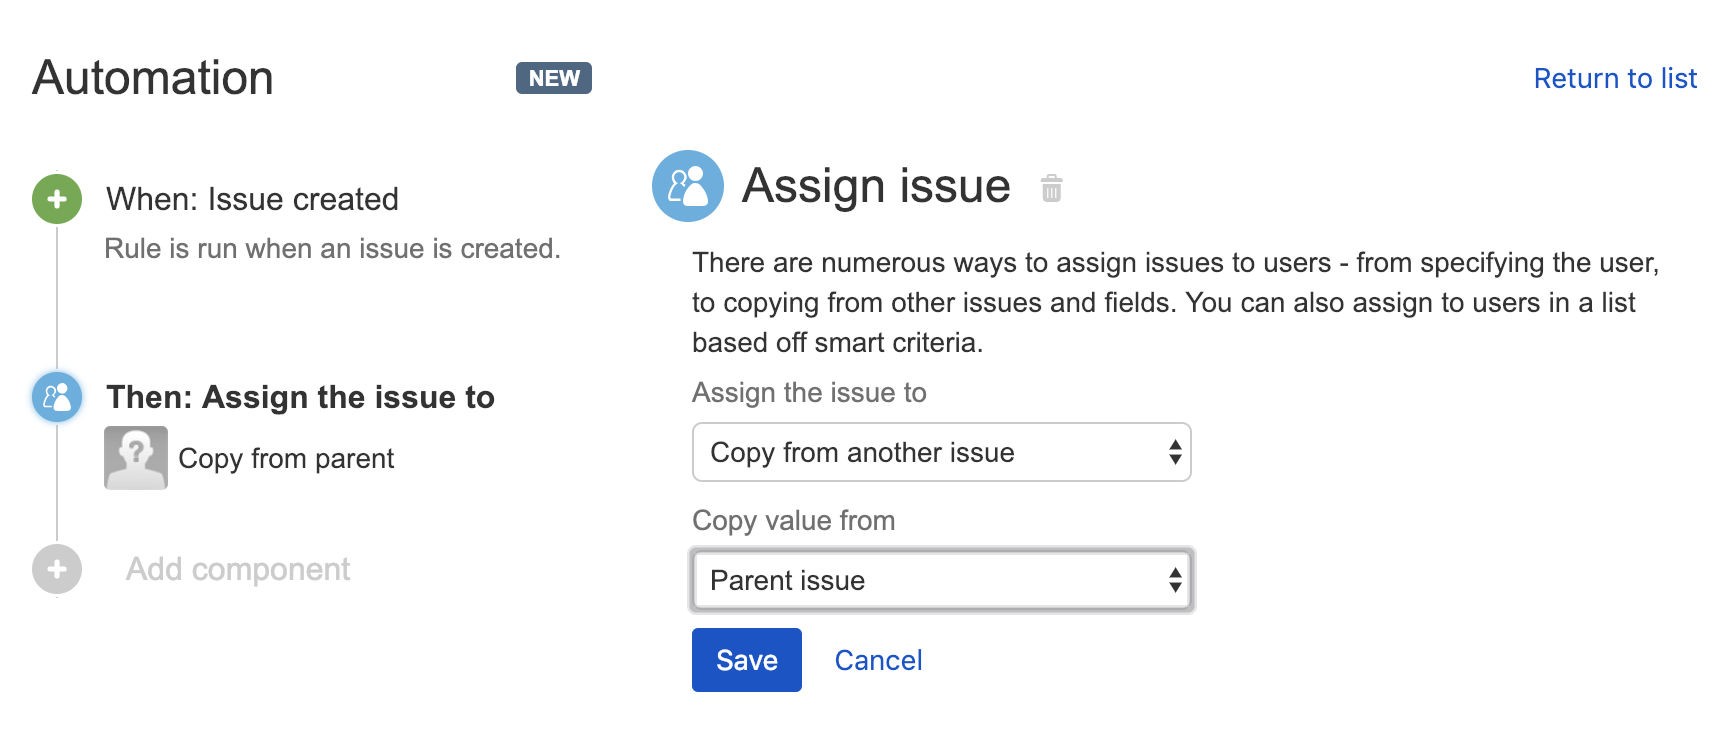
This use case applies if you would like, for example, all child tasks of an Epic to be assigned to the same assignee of the Epic. This eliminates extra legwork and automates the consistency you would want to use in this use case, removing the possibility of error that could make a child task go unnoticed (if it didn't get assigned properly). Say I create an Epic and want to implement all child tasks myself. I can create this automation rule and not worry about assigning any of the child tasks! As I create them, they will automatically be assigned to me.
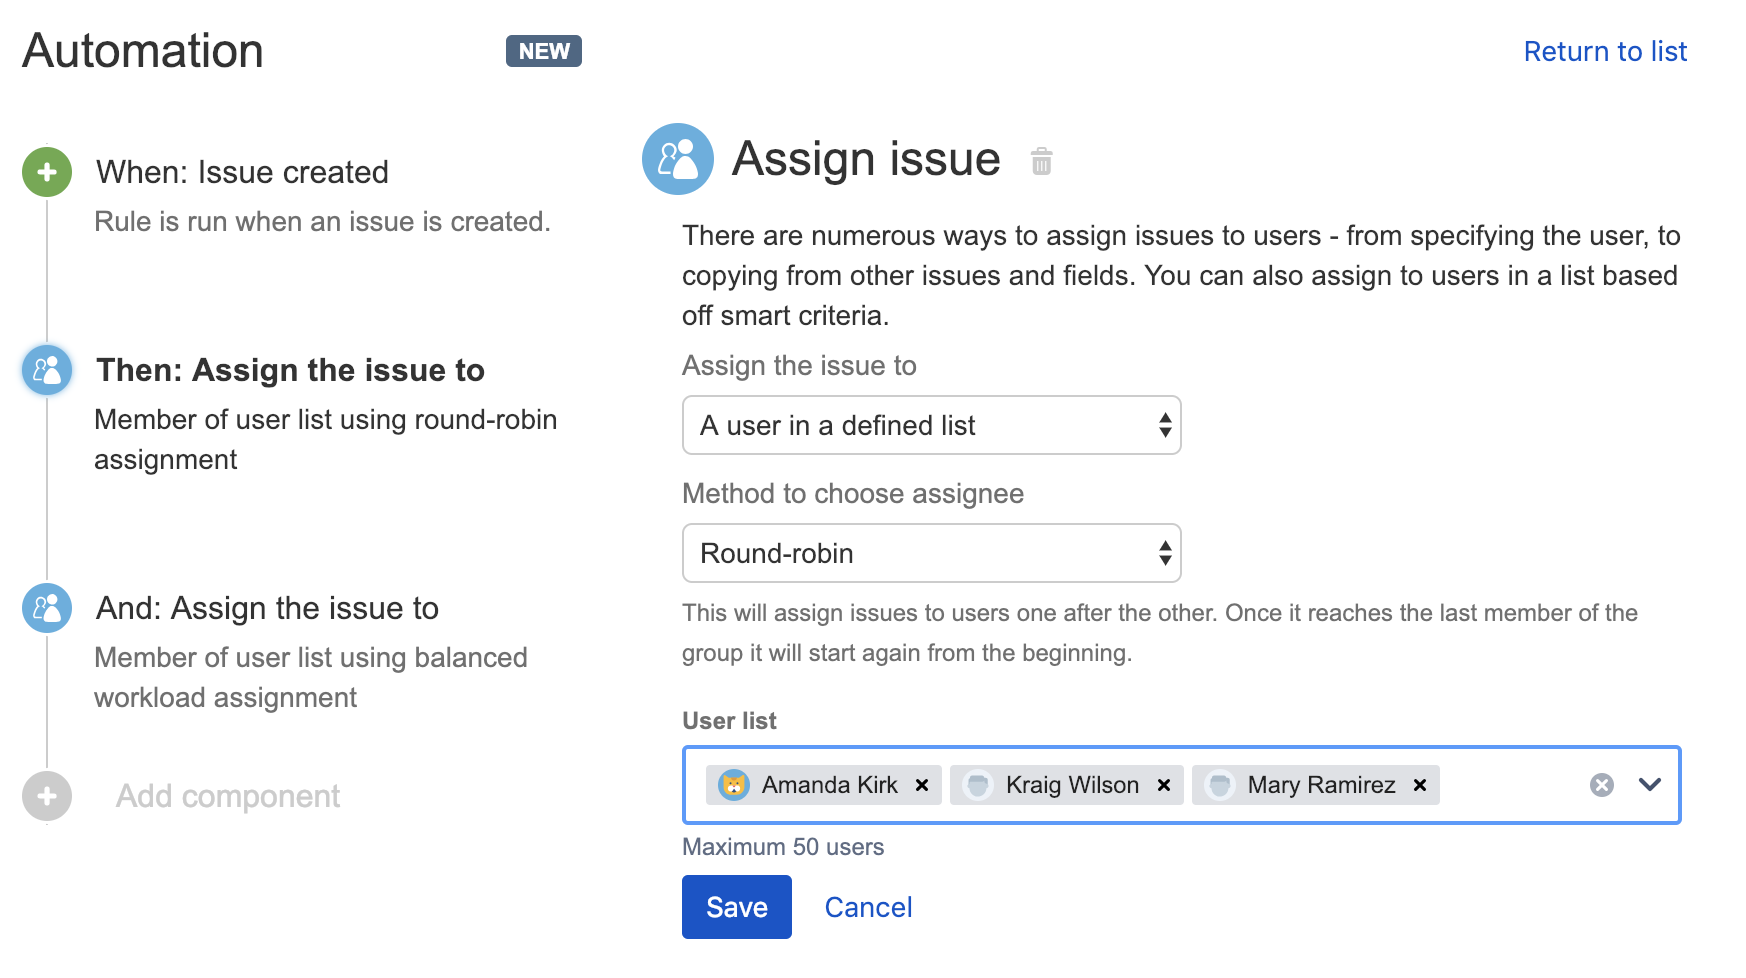
Round-Robin Assigning
This is one of the cooler options I've seen and is meant for tasks or teams that like to "take turns" picking up new tasks. In this use case, we define a list of users and then the issues will be assigned to those users in order (in a round-robin fashion) as issues are created. In the example below, an issue would be assigned to me first, then the next issue created would be assigned to Mary, the third issue created would be assigned to Kraig, and so on and so forth!
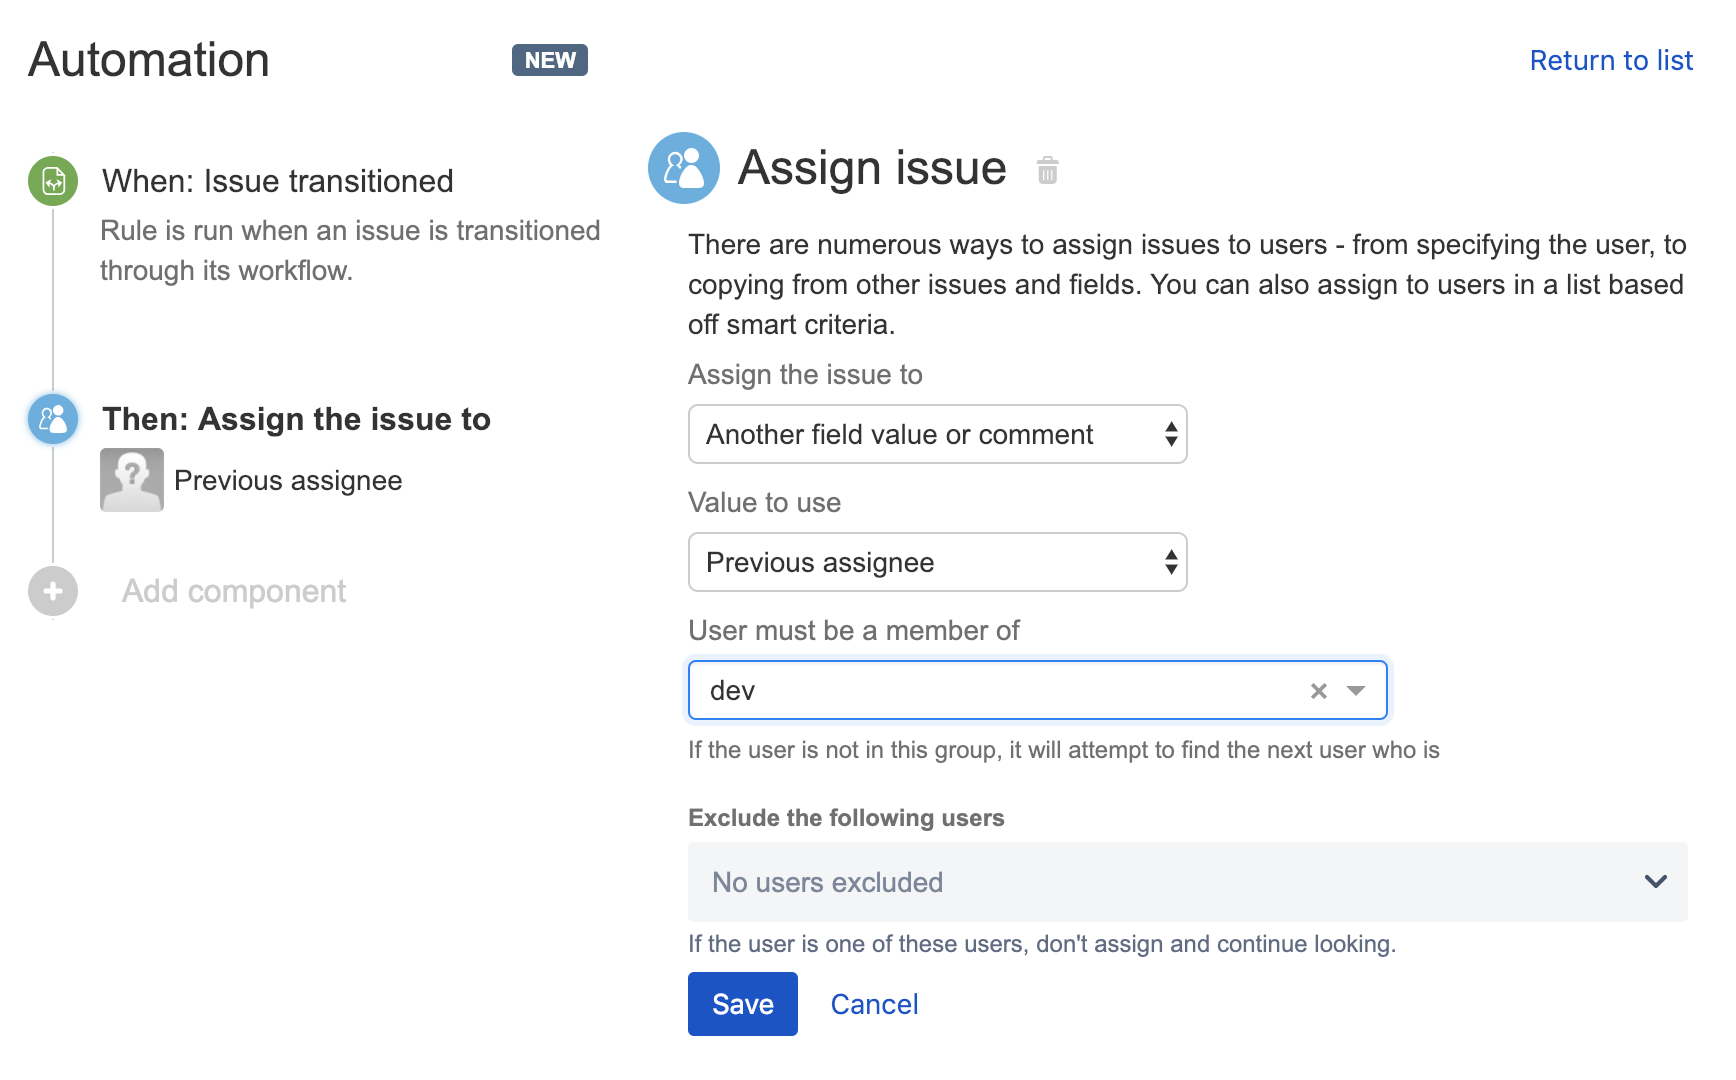
Back and Forth Assigning
This is an amazing feature, finally allowing us to automate the assigning BACK to a person from whence it came. For example, if Kraig handles the issue in QA and then transitions it to me in Verification, I can setup automation to auto-assign it back to Kraig if I transition the issue back to QA! I love this rule because there are so many possibilities. It essentially allows you to control who is assigned the issue based on what status an issue is in, which I think would be helpful in many people's workflows!
Conclusion
I hope this article has helped spark some interest in automating some of the ways your organization may be doing tasks in Jira, even as simple as the way you assign issues within your team. As we saw, Automation for Jira is a powerful App that can save us time and takes the pain out of mundane and tedious tasks we would normally have to repeat regularly and frequently. I do encourage you all to continue to explore the automation possibilities with Jira, whether built-in or via an App. Happy Automating!

 Amanda Kirk

 Trevan Householder
3 MIN READ
Trevan Householder
3 MIN READ

 Bryan Waters