So what will this look like when it's all done?
Take a look below!
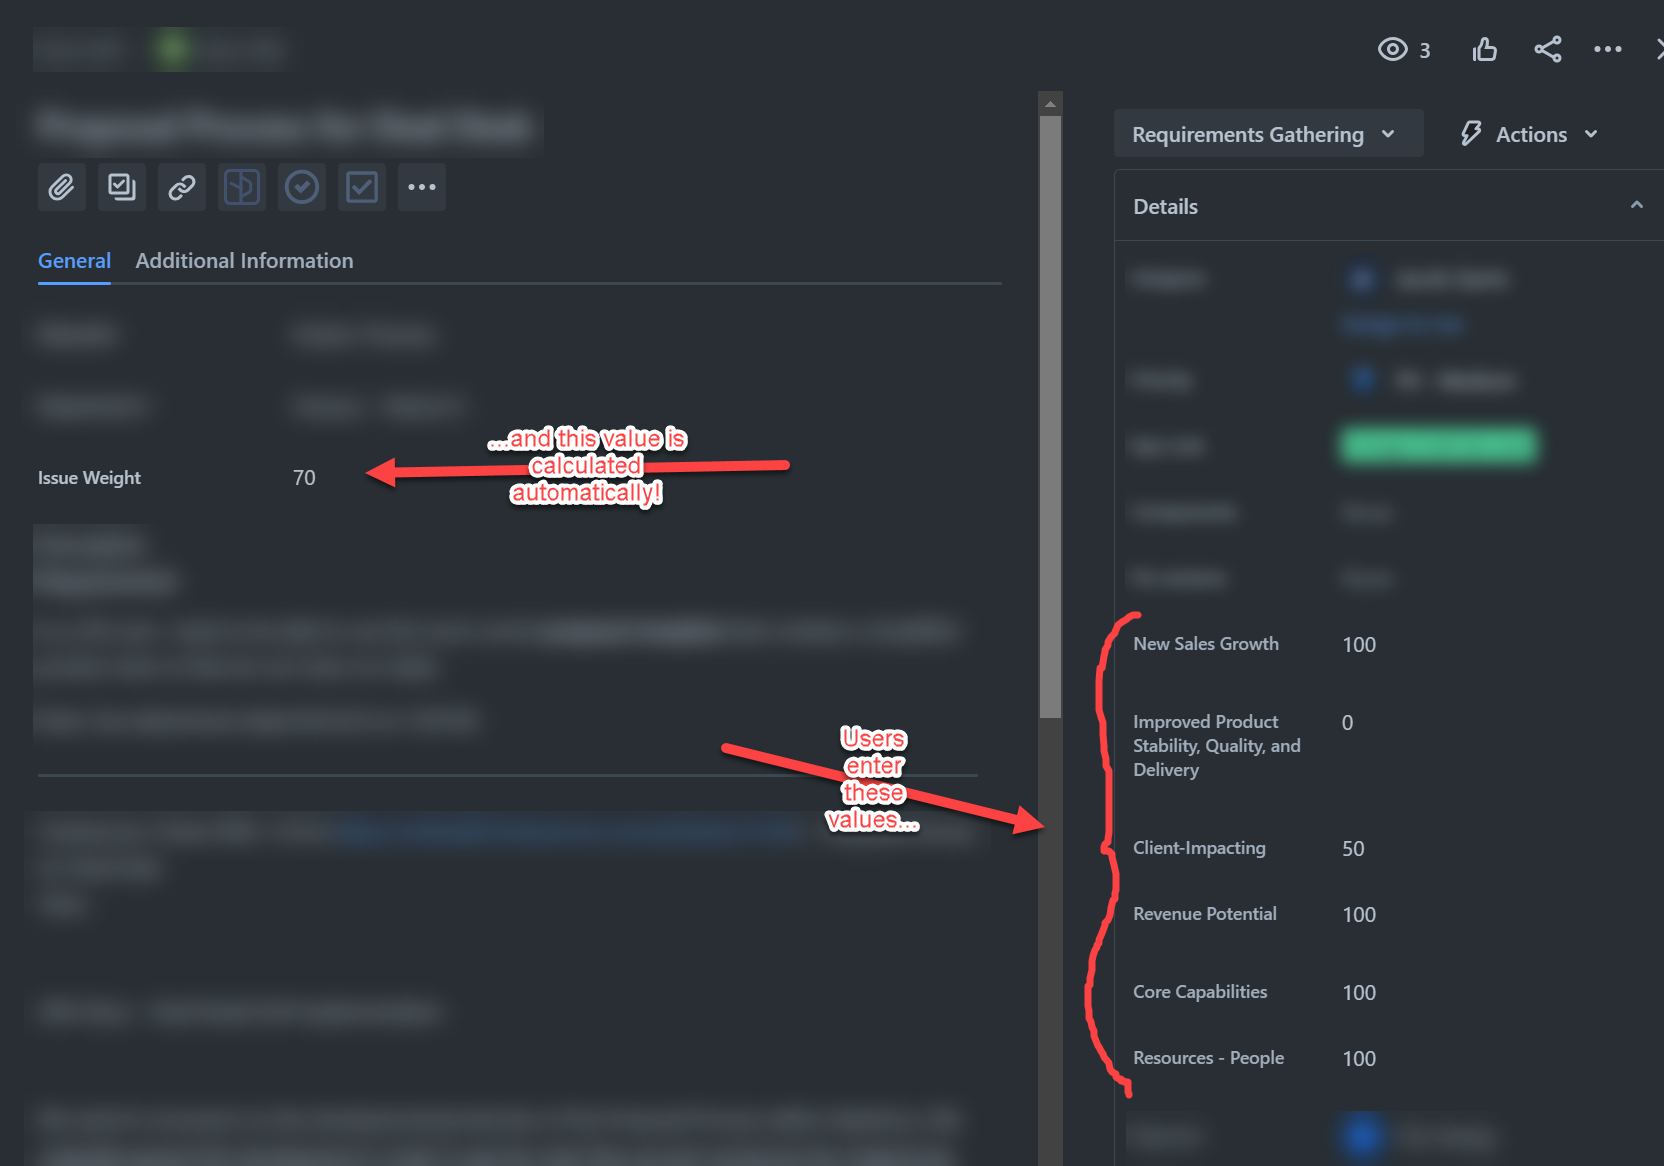
It's that simple! We're gonna use the combination of custom fields and smart value formulas through automation to achieve our goal. And the best part? We're gonna do it all out-of-box in Jira Cloud- no addons required! Now...let's get started!
Setup
First, we will need to set up a new custom field for each criteria you'd like your issues weighted on.
-
Field Name: [Criterion Name]
-
Field Type: Select List (single choice)
-
Options/Values: Up to you!
- Always specify a default value when setting up these fields. I have opted to use 0 for my example below.
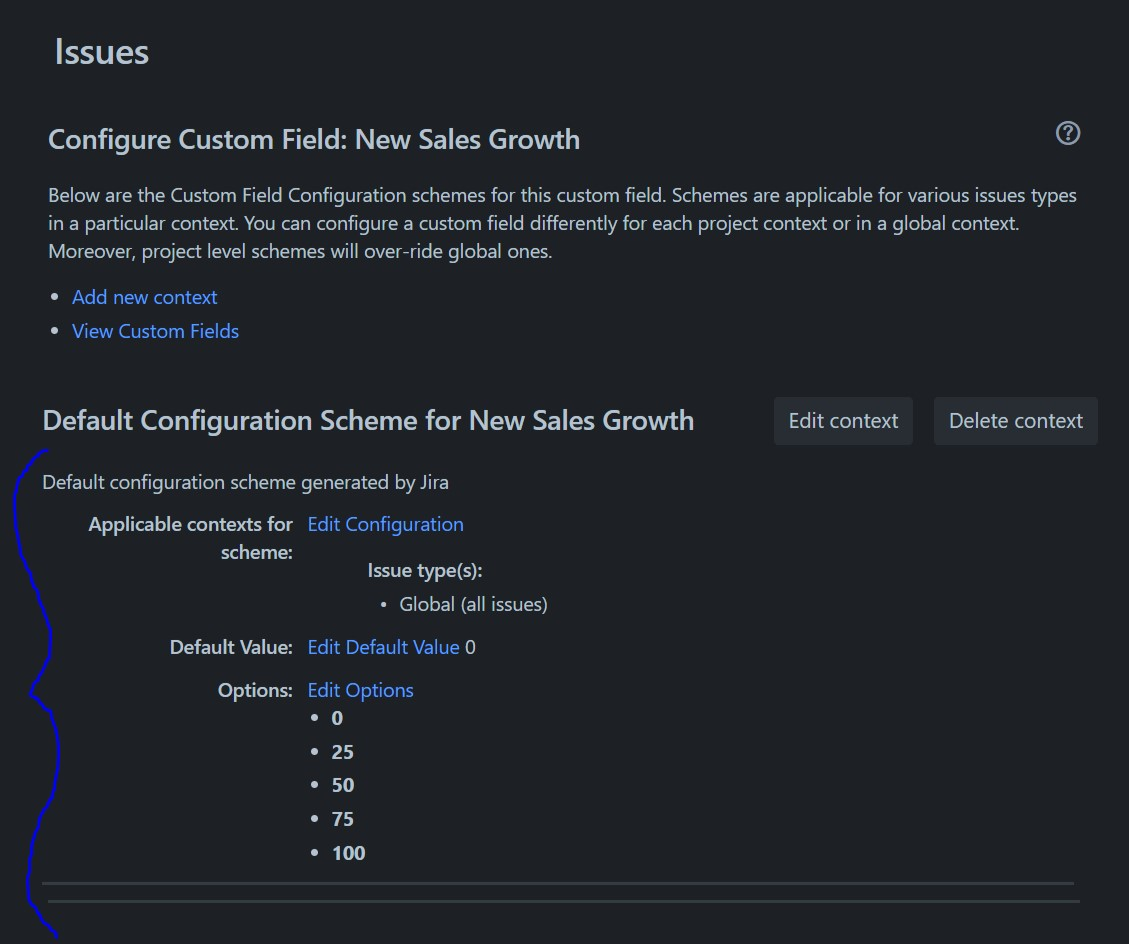
Below is an example of what your criterion custom field(s) might look like. I've created a new weighted criterion called New Sales Growth:
IMPORTANT: You will want to write down the customfieldID of any and all newly created custom fields from this step onward, as they will be necessary for future steps.
-
Please note, that the "Administer Jira" Global permission is necessary to complete these steps.
-
Navigate to Settings > Issues > Custom fields under the Fields section
-
Click on the More (⋯) icon to the right of the custom field you are obtaining the ID
-
Select the Contexts and default value option
-
Observe the URL in your browser, which will contain the ID of the field
- https://xxxxxxxx.atlassian.net/secure/admin/ConfigureCustomField!default.jspa?customFieldId=XXXXX
- This ID number will almost always be 5-digits.
Lastly, create one more custom field, a Single Line Text Field, and call it Issue Weight. This will be the field that holds our final weighted value for each issue! We're now ready to start building our automation!
Building the Automation
This section will break down each step of the process and help you understand how weight values are retrieved and calculated. We will start with a new automation simply called Issue Weight Priority Automation.
The Trigger
This automation will fire whenever the fields found under the Fields to monitor for changes are modified in any way. This includes upon issue creation and when editing an issue when you set your Change type to Any changes to the field value. When we configure our criteria fields with a default value, this ensures that our automation will always fire with this trigger.
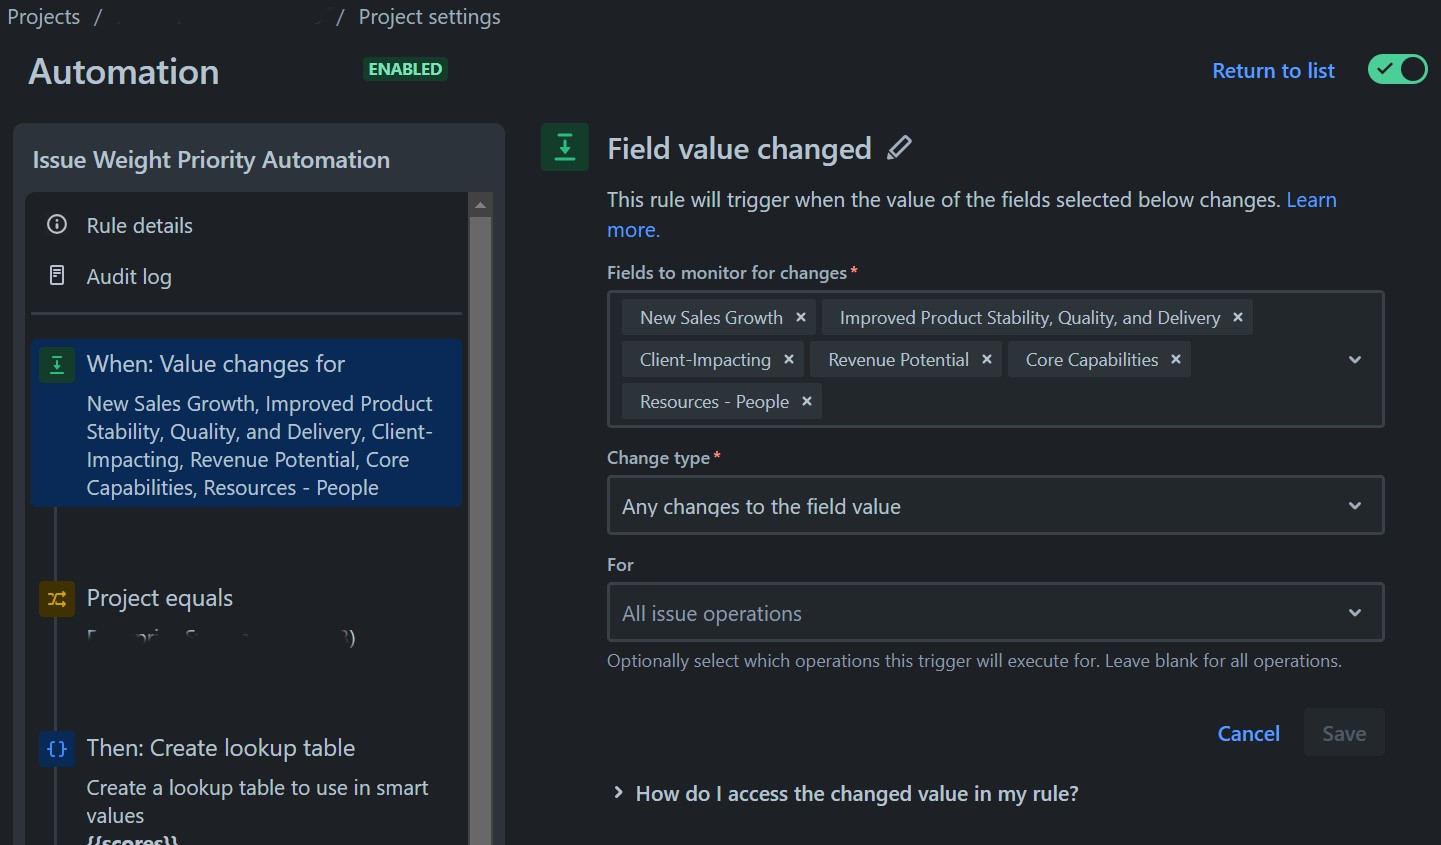
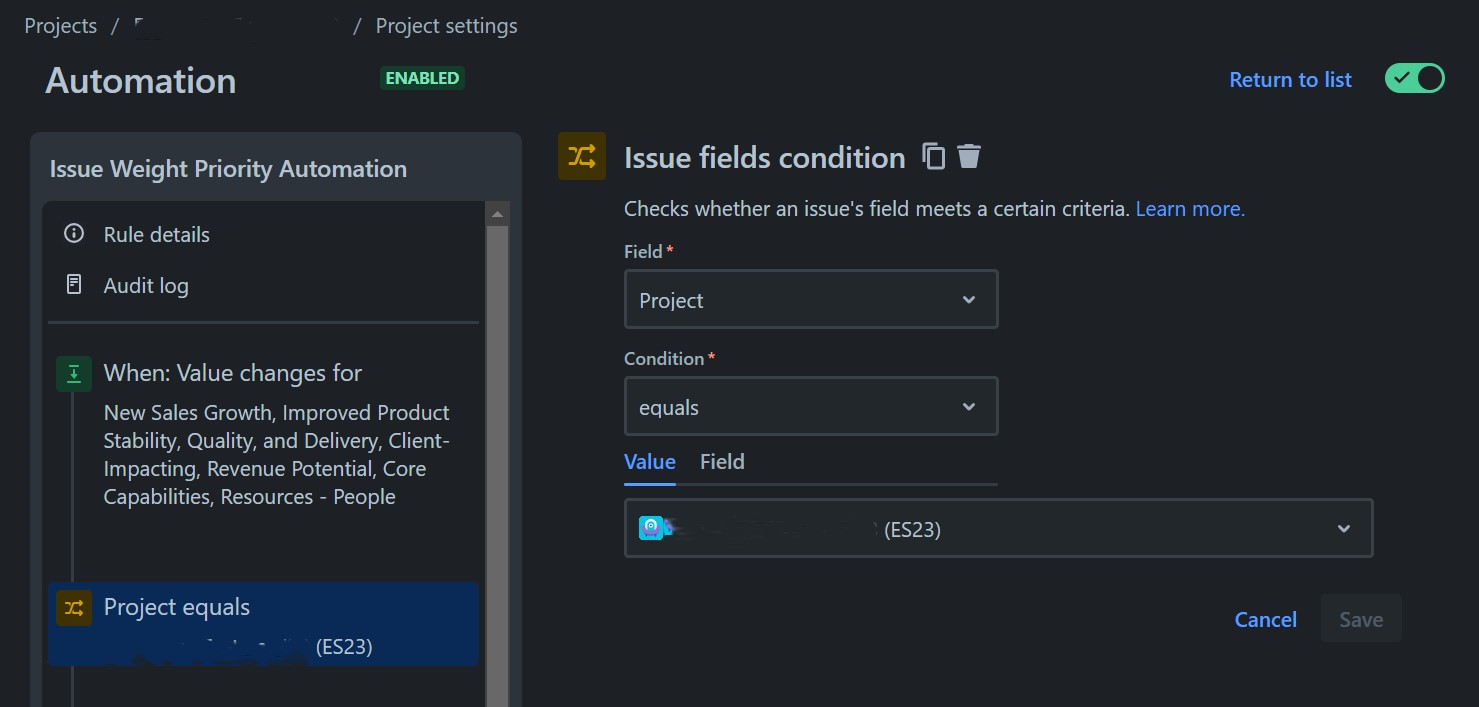
OPTIONAL: Automation Conditions
You can configure a conditional step that will allow this automation to fire only on issues that meet the specified conditions. You can restrict this to a project, an issue type, or even issues with specific field values populated in them. My automation is set to run only on issues in the project ES23.
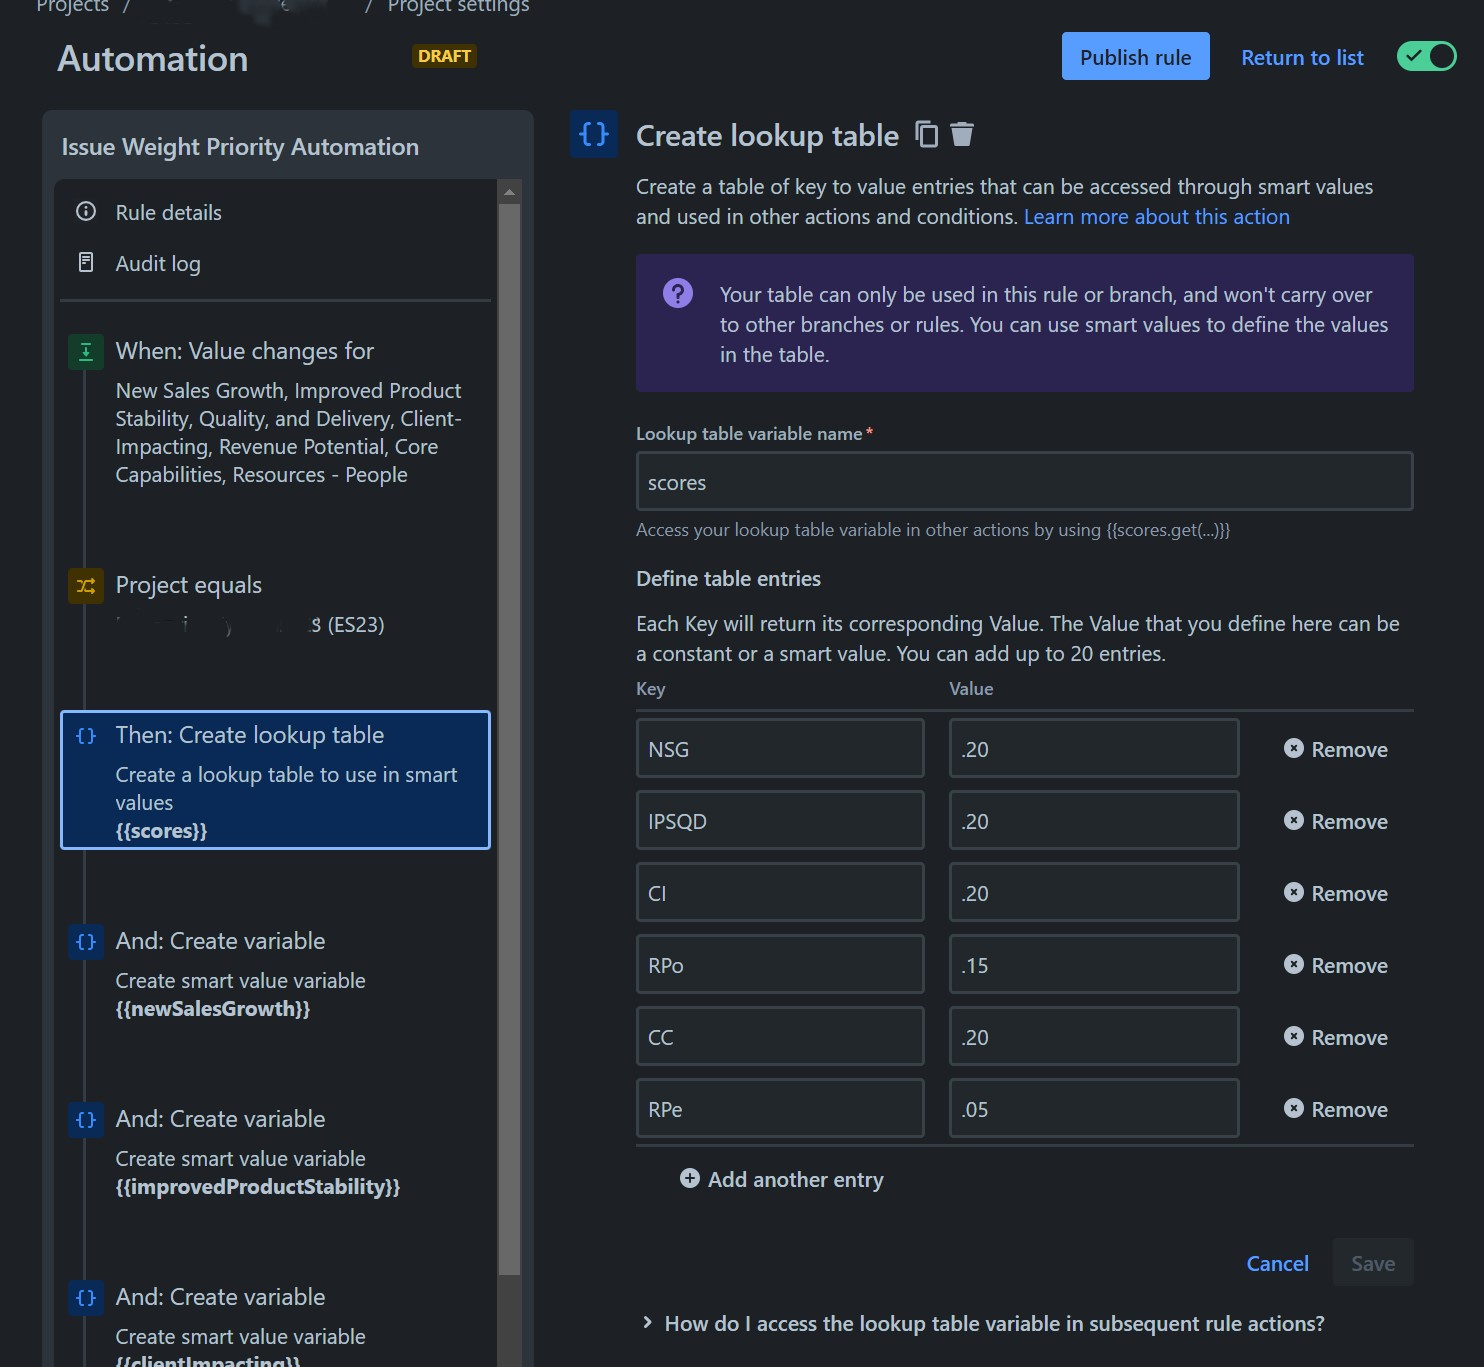
The Lookup Table
This is where we start calculating. The lookup table allows for assigning values to keys that can be referenced later in the automation via the use of smart values. In my example, my Lookup table variable name is scores, so referencing a value from this table looks like this:
You can create your own key abbreviations and assign a value to each of them! In my example, I have six criterion custom fields that will contain values, so I created six entries for key/value assignments.
Let's use a specific smart value to pull a value from my table as an example! If I decide I want to reference the value for key NSG later in my automation, I would enter . Jira will then retrieve a value of 0.20, or 20%, for me to use. This is because the value adjacent to key NSG is .20 in my table. These values do not have to be in decimal format in other automations, but for our purposes here, they do.
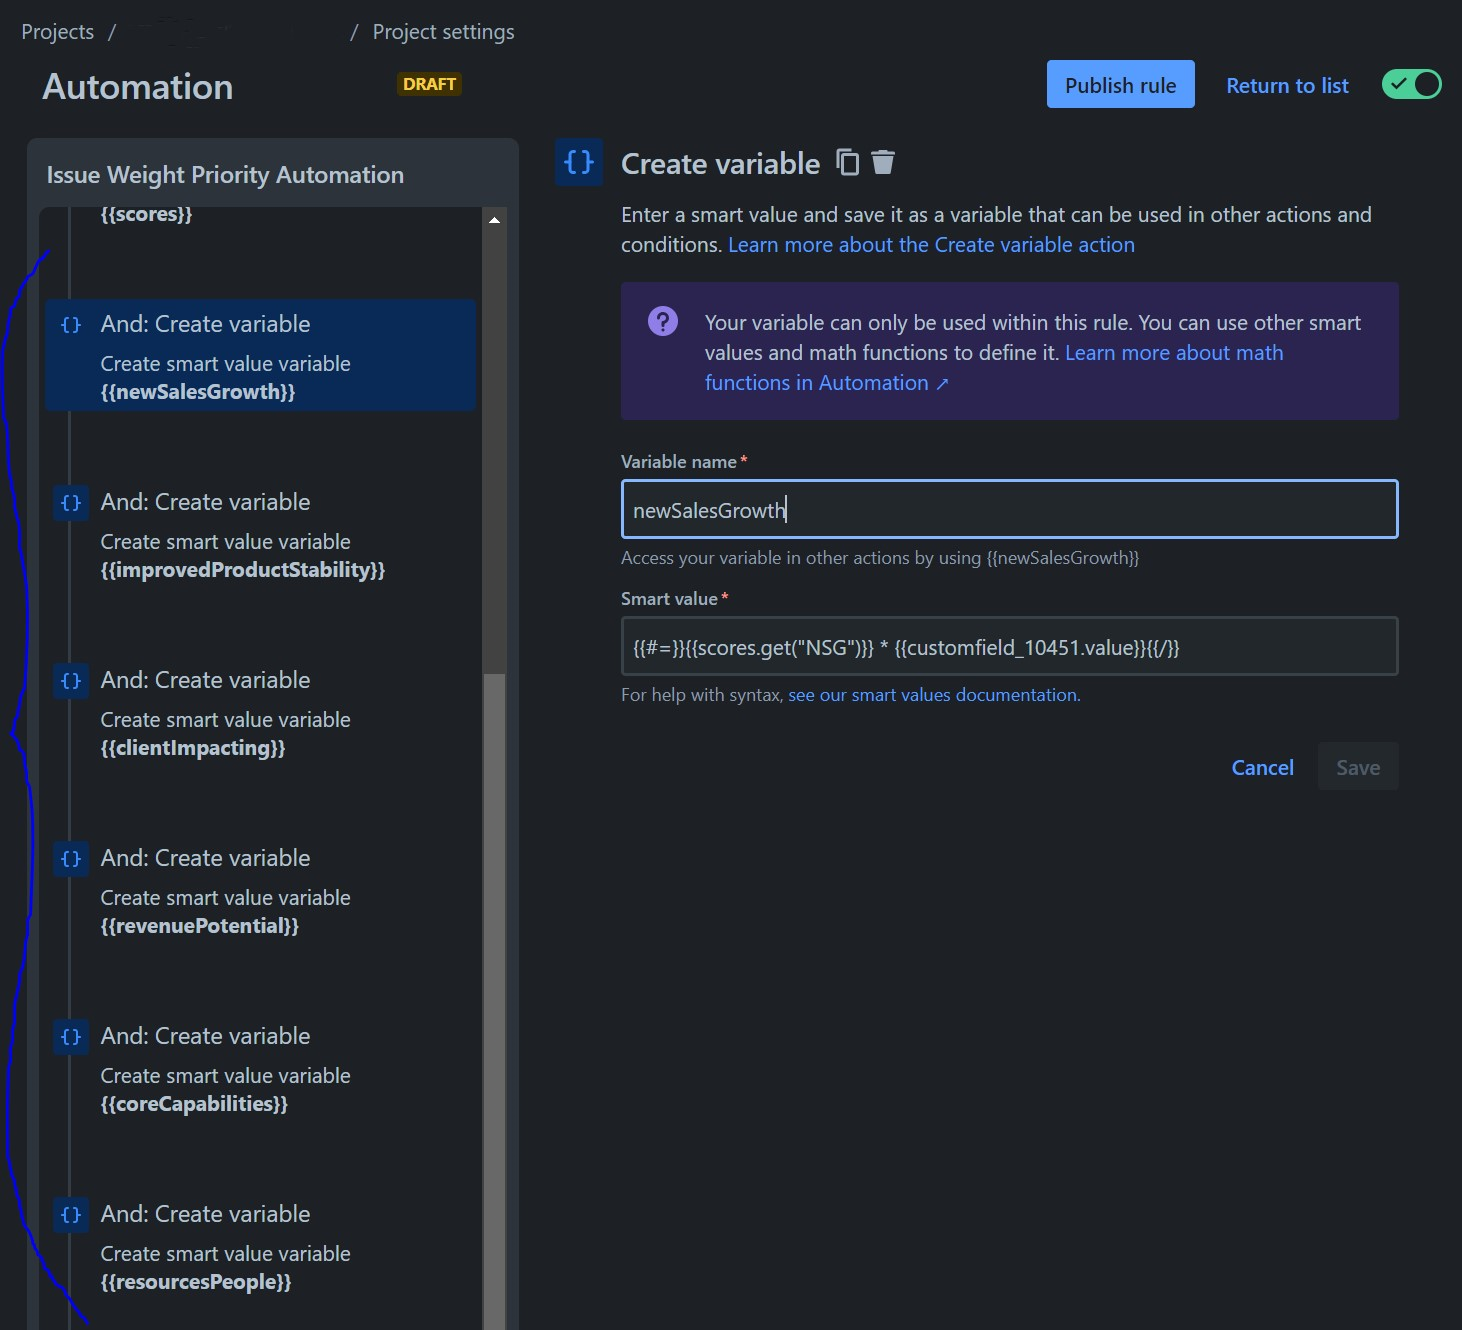
The Weight Criteria Smart Variables
Using custom fields' values and smart value formulas, we are able to grab the user-defined value for each weight criterion and multiply it by the value defined in the lookup table we just made! In my automation, six weight criteria were defined and six variables were created, each with their own version of the formula shown below.
The Issue Weight Variable
We're almost at the end! We're going to utilize all of the variables we've created up to this point, so once all weight criteria variables are defined, we will create one more smart value formula to sum all of the previous variables together and get our final issue weight. Go ahead and name the Variable name something like issueWeight. Here's how you'll want to format your Smart value, where the category is what you previously named your category smart variables from the last step:
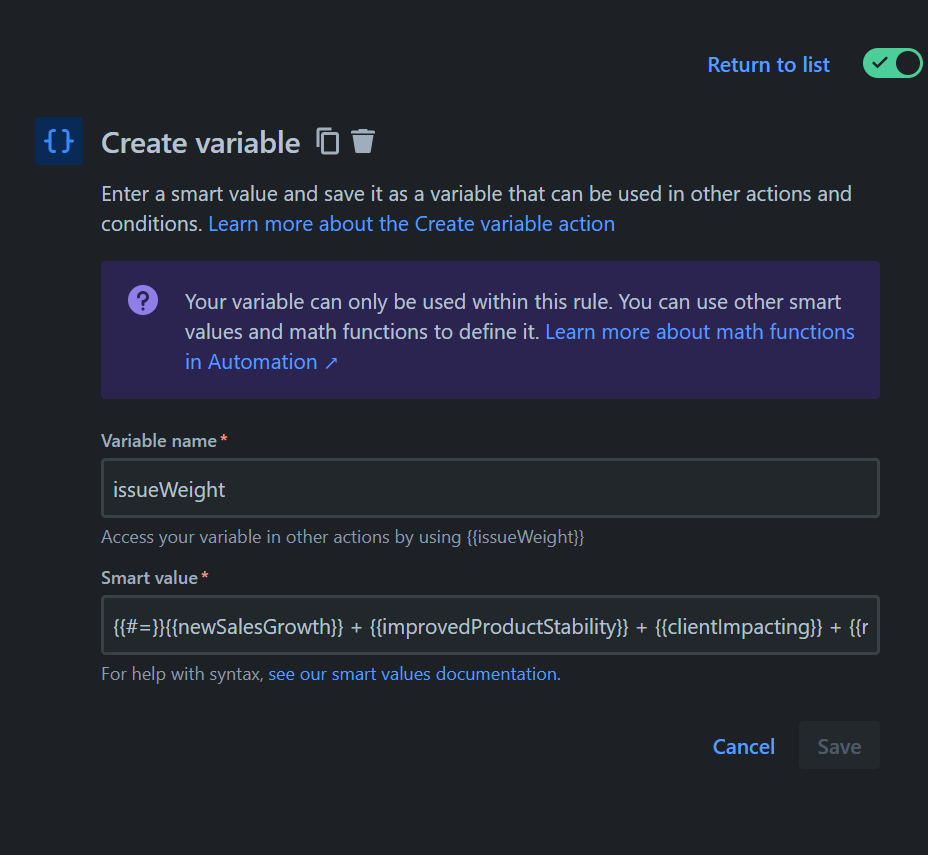
Watch Out: Double-check your work here thoroughly as the smart value box is smaller than the length of the formula entered. You can see mine is running off the page! It is recommended to make changes to this formula in Notepad or another text editor and then copy/paste the smart formula back into the smart value field to ensure no mistakes are made.
Editing the Issue Weight Field
The final step of this automation is responsible for retrieving the smart variable from the previous step and putting this value into the Issue Weight field on the issue in question. It is recommended to exclude your Issue Weight-equivalent field from any Edit screens so that the field remains read-only; this will ensure that only this automation is able to make changes to this field.
FAQ
Now that my automation is published, can I add/remove/change weighted criteria in the future?
Absolutely! You will want to re-configure the following steps of your automation in order to add/remove weighted criterion:
- Trigger
- Add/remove Fields to monitor for changes
- Create a lookup table
- Add/remove/change key/value pairs
- Create variable
- Add/remove/change variables for weighted criterion
- Add/remove/change variable for total issue weight
I'm receiving errors on my automation- where did I go wrong?
The audit log is a great tool when determining the cause of certain issues/errors that are encountered as the automation runs. Problems such as missing field contexts and null field values can lead to this automation erroring, so you will want to consult the audit log via the broken issue or the automation itself to get to the root of the problem.
Smart values are great! Where can I learn more about them?
Check out the sources I referenced below! You can learn a whole lot more about automation, custom fields, and smart values by checking out those articles.
Sources
 Robbie Pusey

 Are you looking for a simple method of ranking the importance of issues at a glance in Jira Cloud? Would you like to assign weighted values to categories of issues to convey priority to users? Is this value something you'd like to be able to report on and filter issues by?


 Trevan Householder
3 MIN READ
Trevan Householder
3 MIN READ

 Isos Technology
