Guest Contributor: Damian Rosochacki

If you’re a Jira admin or a power user, at some point you’ve come across the following question, or a variant of it: "How can I create a template of issues?" Depending on the requirements, implementing a solution for this may take you anywhere from five minutes to a couple of days (or weeks, or months). Today, we’ll cover the shorter end of the spectrum and show you how to quickly set up a template for an Epic, Issues, and Sub-tasks. It will take you less than five minutes if you use the Jira Miscellaneous Workflow Extension app’s Create Issue post-function.
The Set-Up
For this example, we’ll pretend that we’re setting up a template to track the making of a pizza and the serving of a hungry customer. The hierarchy is as follows:
- Epic: The order itself
- Tasks: Stages of making and delivering the pizza (take the order, bake, deliver)
- Sub-tasks: Checklist for the different stages
Our issue type scheme will only contain three issue types (Epic, Task, and Sub-task,) and we only need one workflow. Once you have this ready, edit the workflows, Create transition, and add the “Create/clone issue” post-function.

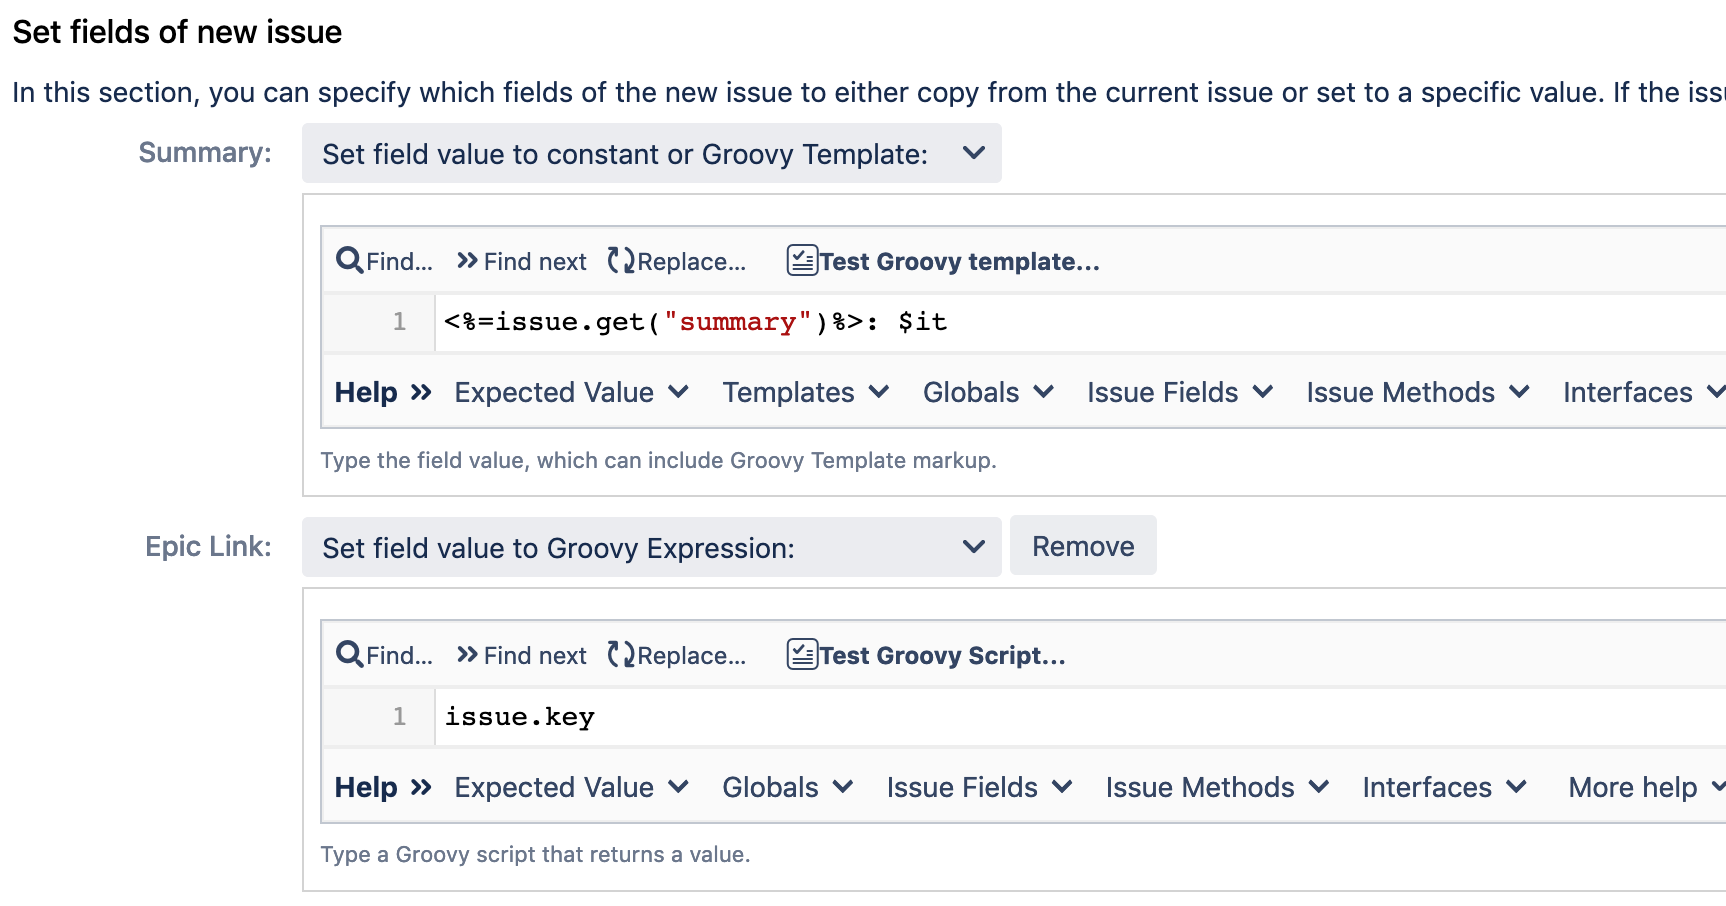
Update the following settings (see screenshots below for reference):
- Issue type > Set to Task
- Set field > Add “Epic Link” > Set to "${issue.key}" ← This will link your new Task to the Epic
- Add “: $it” to the Summary. The $it variable will reference the iterator value.
- Set the checkbox for “Create multiple issues” to enable the iterator. For the iterator, we need to provide a list of values that will be used in place of the $it variable for every issue created. Use this value:
["Take Order", "Bake", "Deliver"]

The last step is to add a condition that will only run this post-function if the original issue is an Epic. It should look like this:

All set! Save this post-function and create another one just like that for the sub-tasks. Note the following differences:
- For issue type, choose "Sub-task."
- You don't need to set the Epic Link field.
- For the condition, change the value you're checking to "Task."
- Use this example for the iterator value:
if (issue.get("summary").contains("order"))
{ ["Get name","Get address", "Get order"] } if (issue.get("summary").contains("Bake"))
{ ["Make dough","Add toppings", "Put in the oven"] } if (issue.get("summary").contains("Deliver"))
{ ["Quality check","Prep for delivery", "Drive to customer"] }
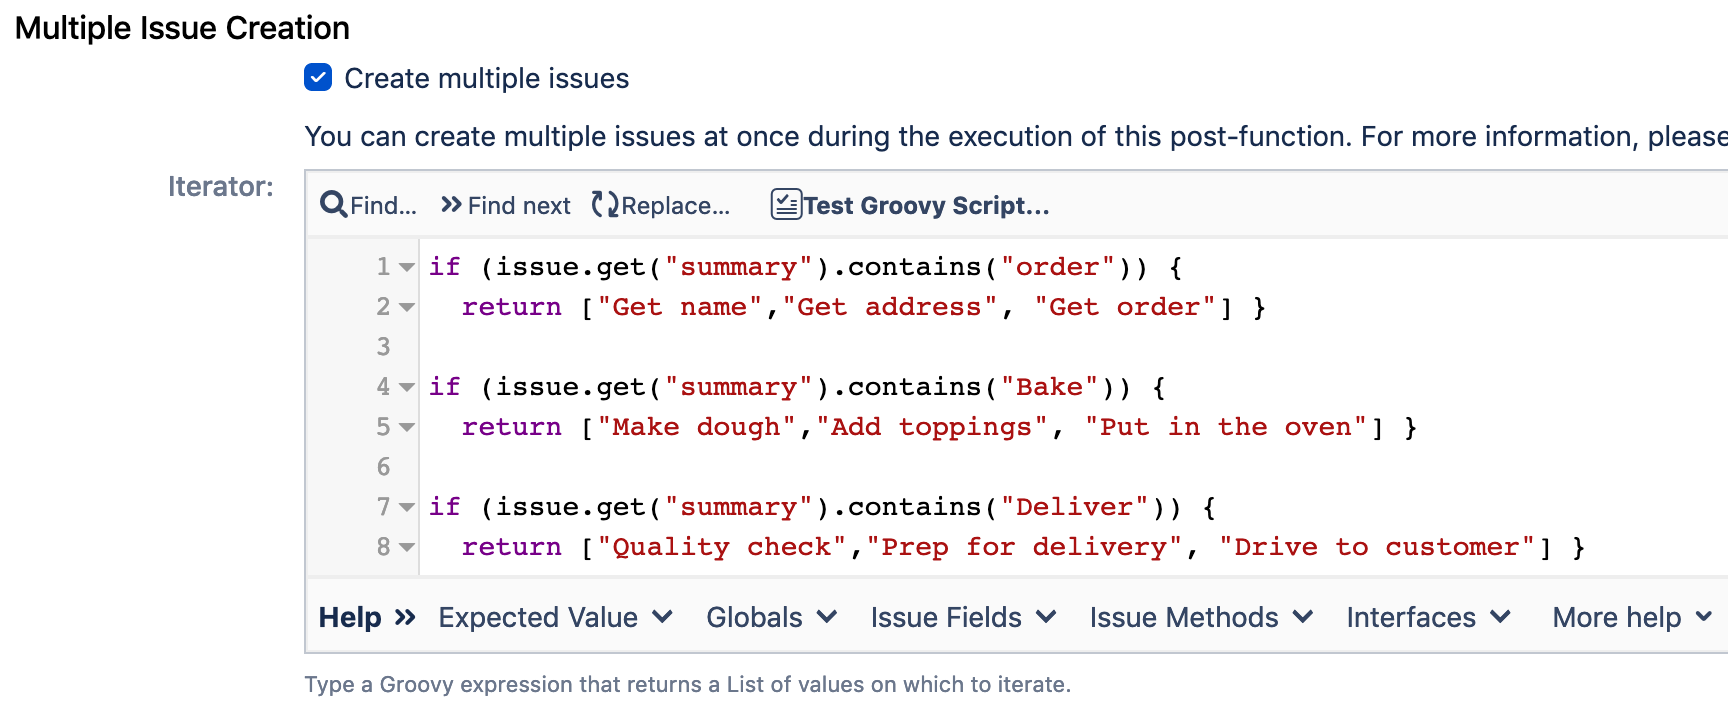
This is where the iterator really starts to shine. You can condition the return value on any field or combination of field, system, or custom, allowing you to create complex template logic with minimal knowledge of how to use Groovy. In this case, we're using keywords in the summary (that we set using the previous post-function) to determine which set of sub-tasks is needed.
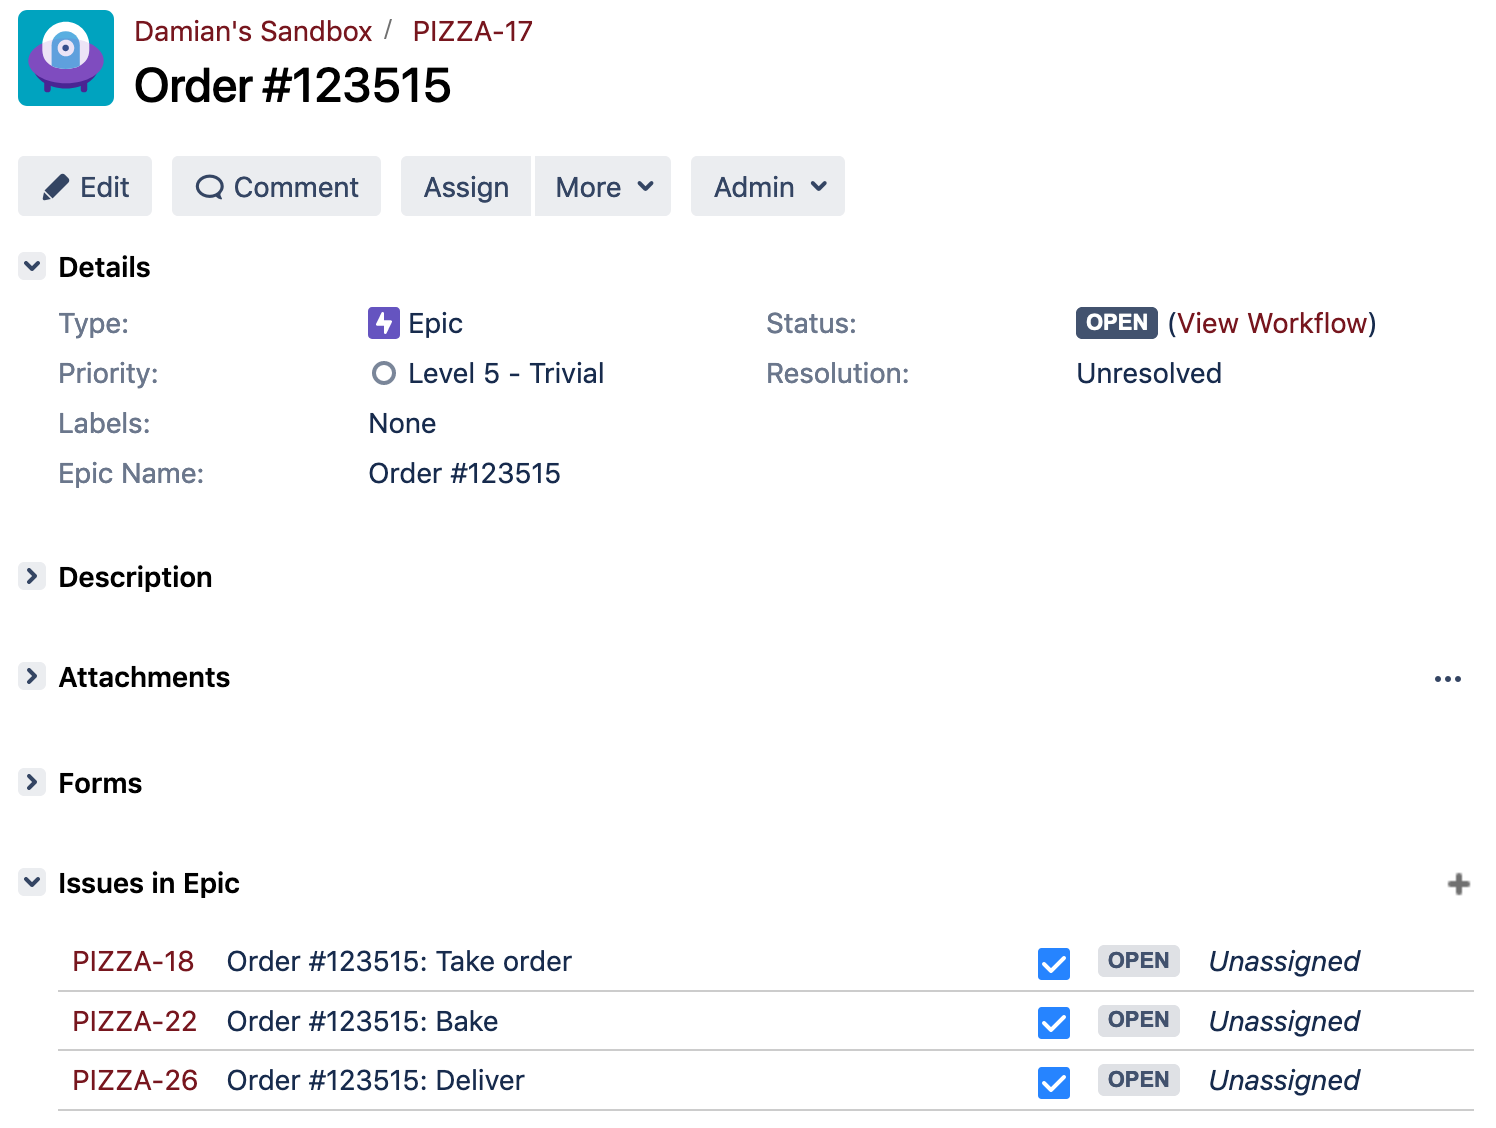
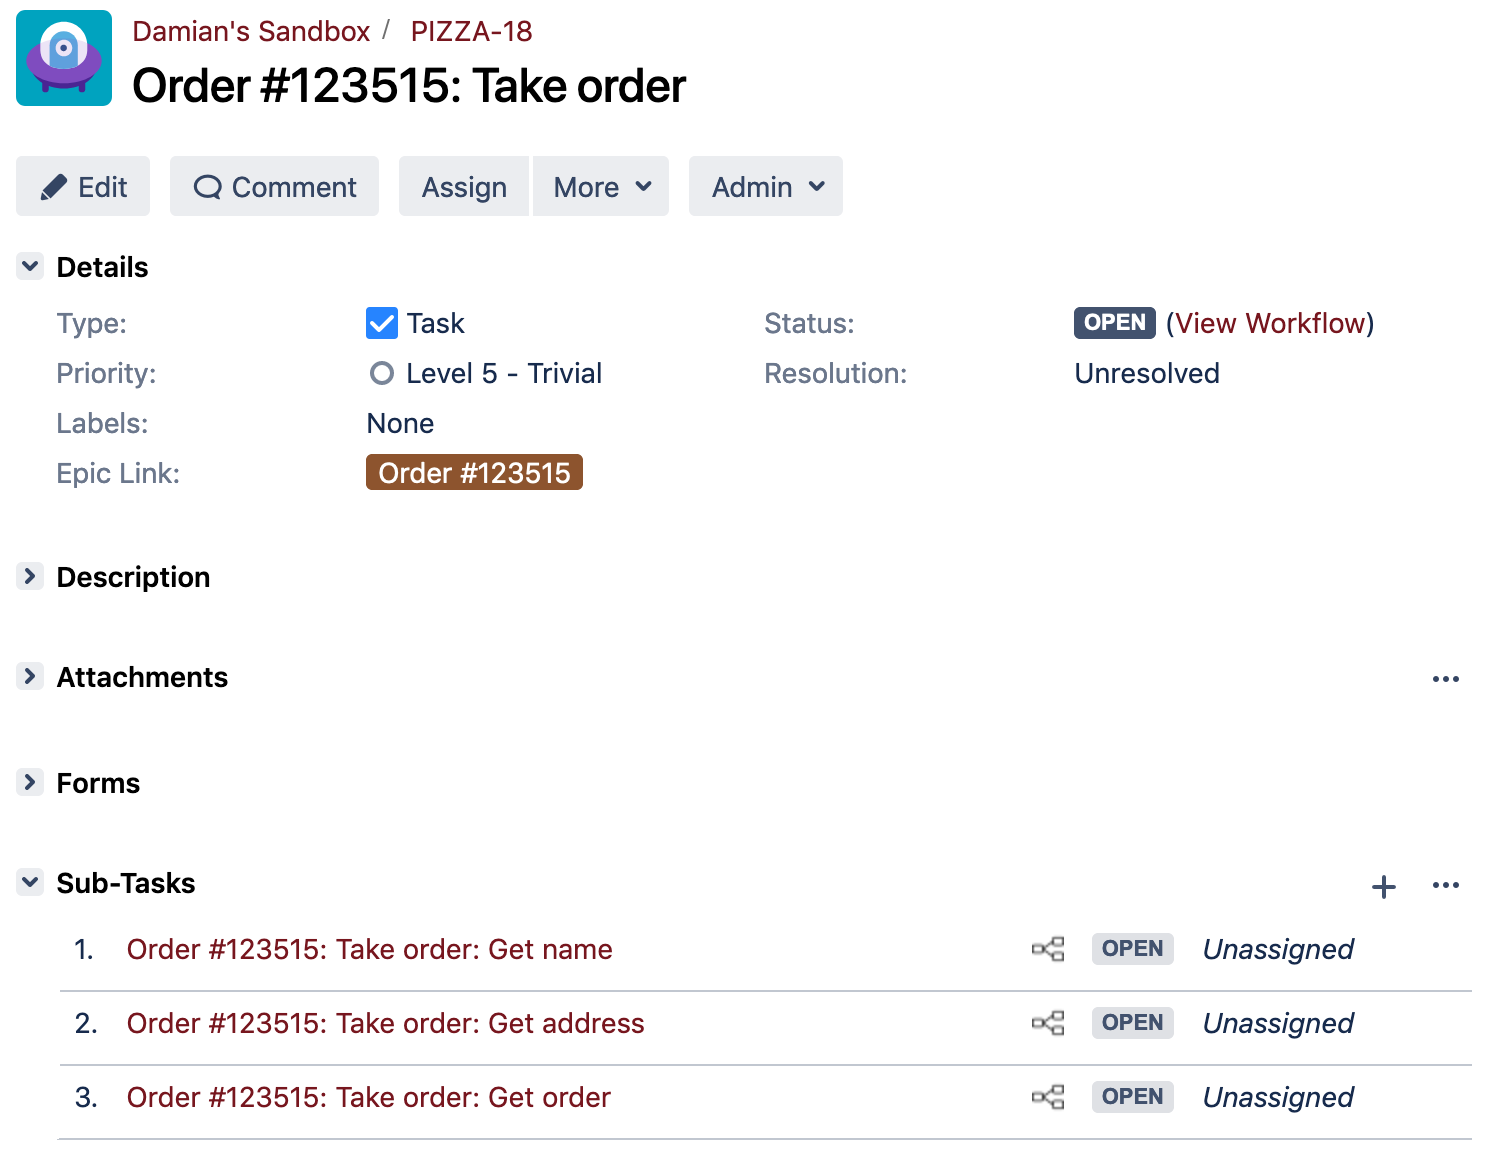
Once you've set up the two post-functions on your workflow, publish it, and create a test Epic. Your final output should look similar to this:
Final Thoughts
I hope this quick tutorial gives you an idea of how easy it can be to set up an automated template of issues. The ability to use Groovy expressions and scripts to set field values alongside the iterator in a single post-function makes it a breeze to manage and update your templates.
Remember to thoroughly test your new configuration before deploying it to your live instance, especially whenever you're creating new issues automatically.
The JMWE plugin is a budget-friendly option for Jira admins looking to extend the power of the out-of-the-box workflows with easy-to-use scripting tools for Groovy. It's one of many tools used by Isos Techology consultants to help clients automate and optimize their Jira instances.
Sign up to receive more great content
Learn more about Atlassian and how Isos can help by signing up to receive our latest blogs, eBooks, whitepapers and more.
