 Wouldn’t it be nice if everyone you were waiting on would approve their Jira issues right away? Sadly, some approvers need additional time and while taking that time, can forget to go back and approve the issue altogether.
At the time of writing this blog post, Jira does not have a native way to resend the “approval required” email. So, I present to you, an automation rule that will send all pending approvers a reminder email.
Choosing your Trigger:
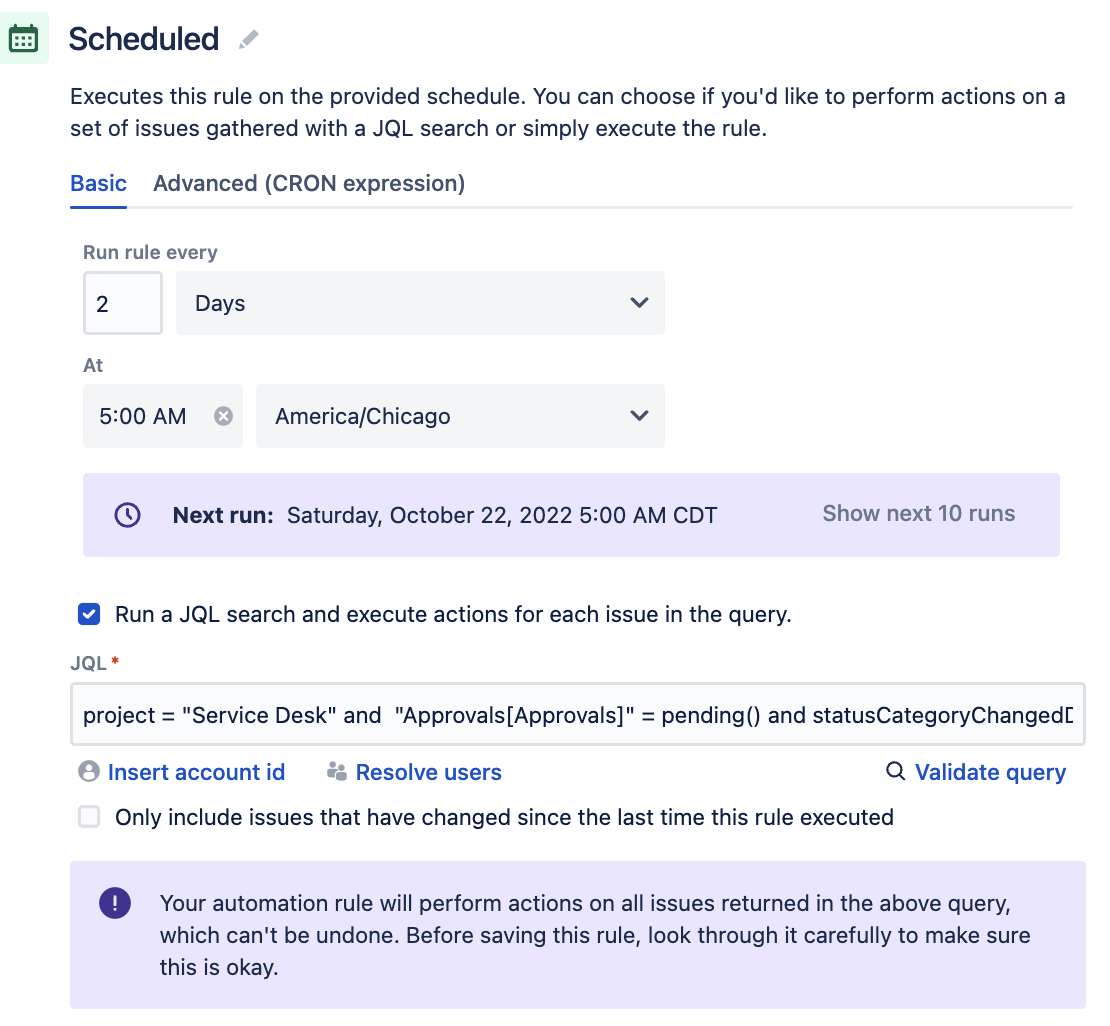
While you can use whatever trigger suits your needs, I prefer a “Scheduled” trigger. In this scenario, I want to send my reminder out every 2 days until the approver has approved.
I use this JQL to pull in my issues:
project = "Service Desk" and "Approvals[Approvals]" = pending() and statusCategoryChangedDate < -1dHere is what the set-up looks like:

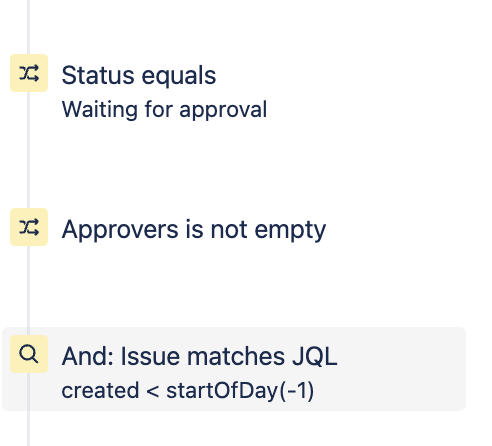
Adding Conditions:
Again, you can add any other conditions to further filter out the issues the rule will run on. These can just as easily be added to your JQL used in the Trigger setup. Here is an example of what I am using:

Adding your Action:
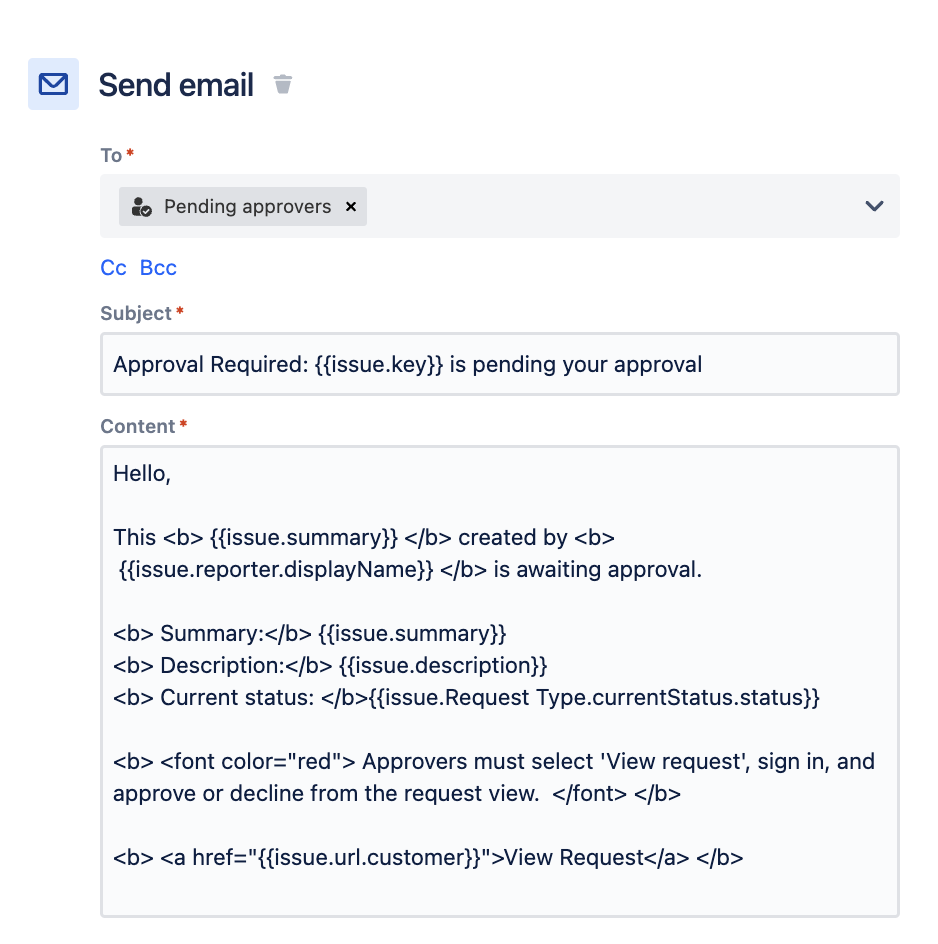
Next, use the “Send Email” action to set up your reminder email using the following steps:
a. In the “To” field, type in and select “Pending Approvers”
b. Add your subject for the outgoing email
c. Add the body of the email into the “content” box. Note that you can use HTML to personalize your message. The downside with this automation rule is that you cannot add a button to approve or decline. To work around this, I like to use a smart value to add a link to the issue, and add bold red text to highlight to the user the need to navigate to the issue to approve/decline.
d. More Info: You can use the “More Info” section to add in a “From” name for the email, or a return email to capture replies. Since the email is coming from an automation rule, natively, the email will come from a “do not reply” email and replies are not added to comments. If you have email requests turned on in your JSM project, you can add your JSM Project email address here so that replies will be added as a comment.

Now that you have a starting point for your “email reminder,” I encourage you to take your shot at customizing your reminder with your own text, smart values, etc.
Bonus Tip:
Instead of using the “Send email” action, if you only have one approver listed, you can use the “add comment” action to tag the approver using the smart value: [~accountId:]
Sadly, if you have multiple approvers in the approval step, then the smart value will not work.
Sign up to receive more great content
Learn more about Atlassian and how Isos can help by signing up to receive our latest blogs, eBooks, whitepapers and more.


